Stop wasting precious time searching for misplaced tools. End the frustration of a chaotic and inefficient Portable Tool Storage Box. The MEIJIA Portable Tool Storage Box provides excellent solutions for organization. Discover 12 smart, actionable ways to revolutionize your Tool Boxes. These methods transform your portable tool storage. Implement these ideas for a more efficient workspace.
Key Takeaways
- Declutter your toolbox first. Sort tools by type and how often you use them. Get rid of unused items.
- Put heavier tools at the bottom of your toolbox. This makes it stable and protects lighter tools.
- Use custom foam inserts or DIY dividers. They keep tools in place and create organized sections.
- Attach magnetic strips for small metal items. This keeps bits and fasteners from getting lost.
- Use removable trays for layered storage. Put tools you use often on top for easy access.
- Label all compartments clearly. This helps you find tools fast and put them back correctly.
- Color-code your tools. This makes it quicker to find what you need and check if anything is missing.
- Organize your toolbox for better work. It saves time, protects tools, and makes your workspace better.
Setting the Foundation for Your Portable Tool Storage Box
Effective organization begins with a solid foundation. Before implementing advanced techniques, establish a clear system for your tools. This initial step ensures maximum efficiency and longevity for your equipment. A well-prepared Portable Tool Storage Box enhances every project.
Declutter and Categorize Your Tools
A cluttered toolbox hinders productivity. Begin by emptying your entire Portable Tool Storage Box. This allows for a comprehensive assessment of its contents.
Sort by Type and Frequency of Use
Group similar tools together. Place all wrenches in one pile, screwdrivers in another, and so on. Within these groups, consider how often you use each tool. Frequently used items deserve prime, easily accessible locations. Less common tools can reside in secondary spots. This systematic approach streamlines tool retrieval during tasks.
Discard or Relocate Unused Items
Evaluate every item. Ask yourself: “Have I used this tool in the last year?” If the answer is no, consider its purpose. Discard broken or irreparable tools. Relocate specialty tools, used only for specific projects, to a separate, long-term storage area. This frees up valuable space in your primary toolbox for essential items.
Strategically Place Heavier Tools at the Bottom
Proper weight distribution is crucial for any portable storage solution. Always position heavier tools at the very bottom of your toolbox.
Improve Stability and Balance
Placing heavy items at the base significantly lowers the center of gravity. This prevents the toolbox from tipping over, especially when you carry it or open its lid. A stable toolbox reduces the risk of accidents and keeps contents secure. It also makes the Portable Tool Storage Box easier to transport.
Prevent Damage to Lighter Tools
Heavy tools, if placed on top, can crush or damage lighter, more delicate instruments. By positioning them at the bottom, you create a protective layer. This arrangement safeguards sensitive equipment like measuring devices, small electronics, or precision hand tools from impact or pressure. It ensures all your tools remain in optimal working condition.
Maximizing Internal Space with Smart Dividers

Optimizing the internal space of a Portable Tool Storage Box significantly enhances its functionality. Smart dividers transform a chaotic container into an organized system. They ensure every tool has a designated place.
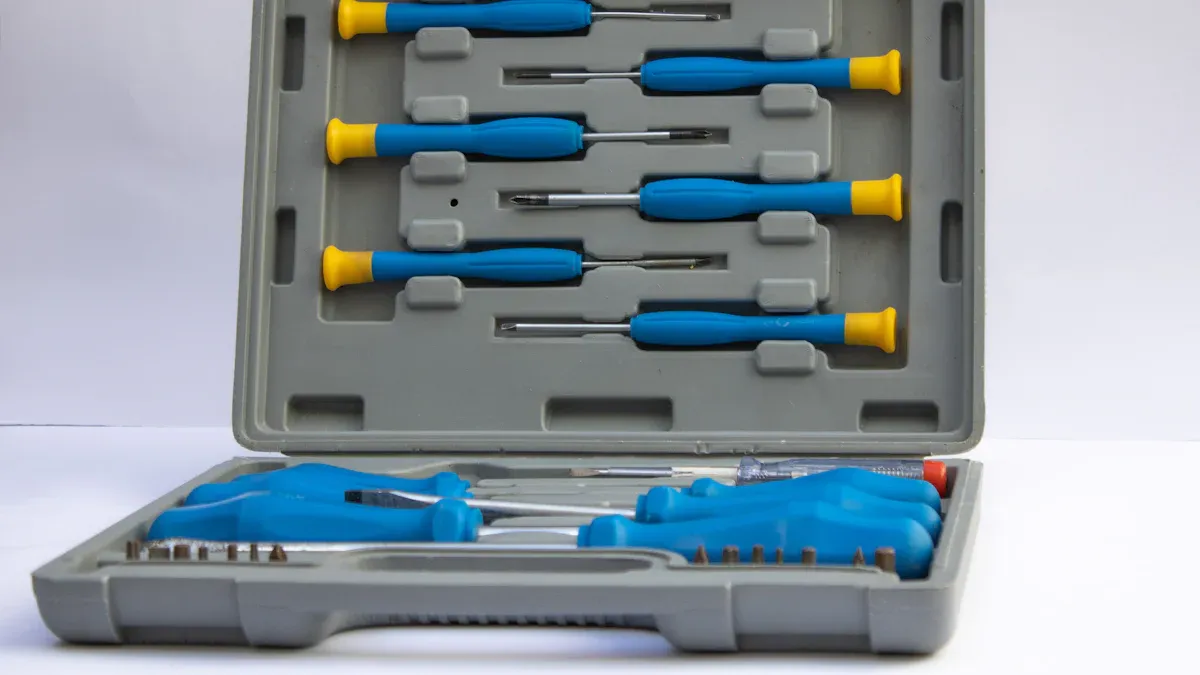
Custom Foam Inserts for Precision Fit
Custom foam inserts offer unparalleled protection and organization for tools. They create a secure environment, preventing movement and damage during transport. Many professionals choose foam for its precision and protective qualities.
Secure Delicate and Frequently Used Tools
Foam inserts provide a snug fit for delicate instruments. They cushion tools against impacts and vibrations. This protection extends the lifespan of sensitive equipment. Frequently used tools also benefit from dedicated slots, making them instantly accessible. Selecting the right foam material is crucial for optimal protection.
| Material | Key Characteristics |
|---|---|
| Polyethylene (PE) Foam | Closed-cell, firm, durable, easy to cut, cost-effective. |
| Polyurethane (PU) Foam | Open-cell, softer, good cushioning, less durable. |
| Ethylene-vinyl Acetate (EVA) Foam | Closed-cell, elastic, excellent shock absorption, durable. |
| Cross-linked Polyethylene (XLPE) Foam | Enhanced closed-cell, very rigid, impact-resistant, durable. |
| Kaizen Foam | Layered PE foam, easy customization with peel-away layers. |
Create Dedicated Slots for Each Tool
Each tool receives a custom-cut slot within the foam. This method ensures a perfect fit for every item. Users quickly identify missing tools, promoting better inventory management. The precise cutouts prevent tools from shifting, maintaining order even when the box moves.
DIY Dividers for Flexible Compartments
Do-it-yourself dividers offer a cost-effective and adaptable solution for tool organization. They allow users to customize compartments based on specific needs. This flexibility accommodates evolving tool collections.
Use Plastic or Cardboard for Custom Sections
Simple materials like plastic sheets or sturdy cardboard create effective dividers. Users cut these materials to size, forming custom sections within the toolbox. This method allows for quick adjustments and reconfigurations. It provides an economical way to segment space.
Adapt to Changing Tool Collections
DIY dividers easily adapt to new tools or project requirements. Users simply re-cut or rearrange the sections as their collection changes. This flexibility ensures the toolbox remains efficient and organized over time. It avoids the need for constant replacements.
Magnetic Strips for Small Metal Items
Magnetic strips provide an ingenious solution for organizing small metal tools and fasteners. They keep these items securely in place. This prevents them from scattering or getting lost.
Keep Bits, Wrenches, and Fasteners Accessible
Attaching magnetic strips to the inside lid or walls of the toolbox keeps small metal items visible and within reach. Drill bits, small wrenches, and various fasteners adhere firmly to the strip. This accessibility saves time during tasks.
Prevent Rolling and Loss
Small metal components often roll around, becoming difficult to find. Magnetic strips eliminate this problem. They hold items securely, preventing them from moving or falling out. This simple addition significantly reduces frustration and loss of small, critical parts.
Leveraging Built-In Features of Your Portable Tool Storage Box
Many modern toolboxes offer integrated features designed to enhance organization and durability. Maximizing these built-in elements transforms a standard box into a highly efficient storage system. Understanding and utilizing these features improves tool accessibility and extends the life of your equipment.
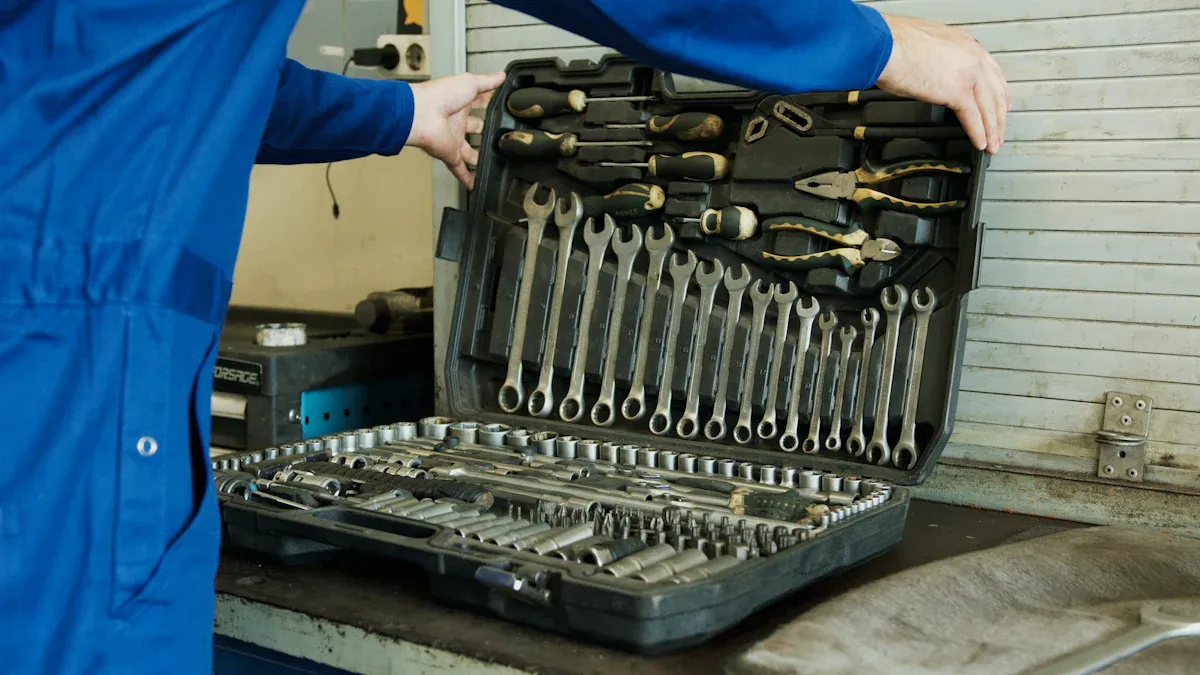
Utilize Removable Trays for Layered Organization
Removable trays are a cornerstone of efficient toolbox design. They provide flexible layering, allowing users to organize tools by size, frequency of use, or project. This design optimizes space within the Portable Tool Storage Box.
Separate Frequently Used Tools from Less Common Ones
Place your most frequently used tools in the top removable tray. This ensures quick access during tasks, minimizing interruptions. Less common or specialized tools can reside in lower trays or the main compartment. This separation streamlines workflow and reduces search time.
Access Lower Compartments Easily
Removable trays lift out effortlessly, granting full access to the main storage area below. This design means users do not need to unload the entire box to reach items stored at the bottom. It offers convenience and efficiency, especially when working on complex projects.
Optimize Extra Top Storage Space
Many toolboxes feature additional compartments integrated into the lid. These spaces are invaluable for organizing small, critical components. Thoughtful head cover designs often make these top storage boxes easy to open.
Store Small Parts Like Screws and Washers
Use these top compartments for small parts such as screws, nuts, washers, and drill bits. Their segregated nature prevents these tiny items from mixing with larger tools. This keeps them organized and readily available.
Keep Essential Fasteners Within Reach
Having essential fasteners in the top storage space means they are always within arm’s reach. This eliminates the need to open the main compartment for every small component. It significantly speeds up assembly and repair tasks.
Secure Latches and Reinforced Bases for Durability
The structural integrity of a toolbox relies heavily on its latches and base. High-quality components ensure tools remain safe and secure.
Ensure Tools Remain Secure During Transport
Secure latches are vital for keeping tools contained during transport. Toolbox latches are engineered to secure various storage containers. They come in configurations like keyed locks, combination locks, and draw latches, offering different security levels. Industrial-grade latches often use heavy-duty steel or die-cast zinc, enhancing durability and resistance to tampering. Many users prioritize latches that are easy to replace and weatherproof. These features ensure tools stay put, preventing loss or damage while moving the box.
Protect Contents from Impacts
Reinforced bases provide crucial protection against impacts and wear. Features like anti-slip strengthened base corners make the box durable and stable. These reinforced areas protect the contents from damage if the box is dropped or placed on rough surfaces. A strong base also contributes to the overall longevity of the toolbox, making it suitable for heavy items and prolonged use.
Innovative Solutions for Every Tool
Tool organization extends beyond basic sorting. Creative storage solutions address the unique needs of different tool types. These innovative approaches ensure every item has its optimal place. They enhance accessibility and protect valuable equipment.
Vertical Storage for Long-Handled Tools
Vertical storage maximizes space within a toolbox or on a workbench. This method keeps longer tools upright and easily visible. It prevents them from lying flat and consuming valuable surface area.
Organize Screwdrivers, Pliers, and Chisels
Screwdrivers, pliers, and chisels often create clutter when stored horizontally. Vertical storage solutions, such as custom-built racks or commercially available holders, keep these tools neatly aligned. Users can quickly identify and grab the correct tool. This system reduces time spent searching for specific items.
Prevent Tangling and Damage
Vertical storage significantly reduces tangling and damage. Tools no longer pile on top of each other. This prevents nicks, scratches, and bent components.
Wall mounted systems make it easy to see exactly what you have at a glance—no more wasted time digging through piles of tangled handles or misplaced items.
Vertical storage offers several protective benefits:
- It prevents tools from leaning against walls or stacking in corners, which can lead to falling and causing damage or injury.
- It protects tools from rusting, dulling, or damage due to improper storage.
- It keeps tools off damp floors and allows air circulation, reducing moisture buildup.
Modular Bins and Containers for Small Parts
Modular bins and containers offer flexible organization for small components. These systems allow for easy customization and rearrangement. They keep tiny items from getting lost in larger compartments.
Group Fasteners, Connectors, and Accessories
Users group similar fasteners, connectors, and accessories into individual bins. For example, one bin holds all screws, another contains nuts, and a third stores electrical connectors. This systematic grouping simplifies inventory management. It also speeds up retrieval during projects.
Easily Remove and Transport Specific Sets
Modular bins are often removable. This feature allows users to take only the necessary components to a specific work area. Technicians can grab a bin of specific screws for an assembly task. This portability reduces trips back to the main toolbox.
Tool Rolls and Pouches for Specialized Sets
Tool rolls and pouches provide excellent protection and portability for specialized tool sets. They keep related tools together in a compact format. These solutions are ideal for delicate instruments or project-specific collections.
Protect Delicate or Project-Specific Tools
Tool rolls and pouches offer superior protection for sensitive tools. They prevent items from clanking together during transport. This safeguards precision instruments from damage.
- Utilize padded tool pouches.
- Incorporate foam inserts.
- Use dedicated compartments.
- Wrap tools in bubble wrap for extra cushioning.
- Wrap tools in cloth for additional cushioning.
Keep Related Tools Together for Quick Grab-and-Go
Tool rolls organize tools by function or project. A mechanic might have a roll for automotive tools and another for electrical work. This organization allows for quick grab-and-go access. Users simply pick up the relevant roll for their current task.
Labeling and Identification for Instant Retrieval
Effective labeling and identification systems are paramount for maintaining an organized toolbox. These strategies ensure rapid tool retrieval and promote consistent organization. They transform a functional storage unit into an efficient workspace.
Clear Labels for Every Compartment
Clear, precise labels eliminate guesswork and streamline workflow. They provide immediate visual cues for tool location.
Quickly Identify Contents at a Glance
Users quickly identify compartment contents with clear labels. An industrial label printer produces high-quality, professional, and custom labels. These labels withstand industrial environments, resisting fading, smudging, or scratching over time. Applying labels to drawers, toolboxes, tool chests, and pegboards clearly indicates contents. Crisp labels give the area a clean and professional appearance.
| Material Type | Durability | Cost Range | Best For |
|---|---|---|---|
| Paper | Low | $0.05/sheet | Short-term labeling, dry environments |
| Vinyl | Medium | $0.15/sheet | Most general storage purposes, moderate moisture |
| Polyester | High | $0.25/sheet | High-use areas, harsh environments, long-term storage |
Polyester offers the best durability, while vinyl provides a good balance for most applications. Paper is suitable for temporary or low-impact labeling. For areas with temperature fluctuations or humidity, such as a garage or basement, opt for durable, water-resistant labels. In high-traffic areas, labels must endure frequent handling. Industrial settings require labels designed to withstand extreme temperatures and harsh environments.
Ensure Tools Are Returned to Their Proper Place
Labels act as an ‘accountability partner‘ in maintaining organization. When the designated spot for an item is clearly visible, individuals are more inclined to put it back correctly. This is key to long-term organization. Clear labeling simplifies both finding and returning tools, preventing disarray. Magnetic label holders and coordinating toolbox label templates further reinforce this system.
Color-Coding for Rapid Tool Identification
Color-coding offers a powerful visual method for quick tool identification. It enhances organization and reduces search time.
Assign Colors to Tool Types or Project Categories
Assigning specific colors to different tool types or project categories creates an intuitive system. For example, blue might represent pliers, red for screwdrivers, and yellow for hammers. This helps workers quickly locate the general area for a tool. It also makes a misplaced tool immediately noticeable.
Speed Up Tool Selection and Inventory Checks
Color-coding significantly speeds up tool selection and inventory checks. The two-color shadowing technique is highly effective. This involves cutting tool shapes from one color of foam, such as black, and placing them on a contrasting, brightly colored foam sheet. When a tool is removed, the bright color underneath becomes visible, immediately indicating a missing tool. Similarly, colored drawer liners or inserts highlight missing tools by revealing the contrasting color when a tool is absent.
Readers reclaim their time and eliminate frustration with an organized Portable Tool Storage Box. They protect valuable tools, extending their lifespan and functionality. An organized system prevents damage and wear. Users experience the efficiency and satisfaction of a perfectly organized workspace. This transformation enhances productivity. Start implementing these clever ideas today for a transformed toolbox.
FAQ
How does organizing a toolbox save time?
An organized toolbox allows for quick tool retrieval. Users do not waste time searching for misplaced items. This streamlines tasks and improves project efficiency.
What is the first step in organizing a portable tool storage box?
The first step involves decluttering. Empty the entire box. Sort tools by type and frequency of use. Discard or relocate any unused items.
Why should heavier tools go at the bottom?
Placing heavier tools at the bottom improves stability. It lowers the center of gravity. This prevents the toolbox from tipping. It also protects lighter tools from damage.
What are custom foam inserts used for?
Custom foam inserts provide a precision fit for tools. They secure delicate and frequently used items. Each tool receives a dedicated slot. This prevents movement and damage.
How do magnetic strips enhance organization?
Magnetic strips keep small metal items secure. They prevent bits, wrenches, and fasteners from rolling. This makes these items easily accessible. It also reduces loss.
What is the advantage of removable trays?
Removable trays offer layered organization. They separate frequently used tools from less common ones. Users can easily access lower compartments. This optimizes space and workflow.
Why is labeling important for toolbox compartments?
Labels allow quick content identification. They ensure tools return to their proper place. This eliminates guesswork. It maintains long-term organization.
How does color-coding help with tool identification?
Color-coding assigns specific colors to tool types. It speeds up tool selection. It also helps with inventory checks. Missing tools become immediately noticeable.
Post time: Dec-09-2025